
Looking to make something creepy to dress up your Halloween outfit? Then these instructions on how to make a beaded spider is the tutorial for you.

This project is versatile because you can use different types and sizes of beads – a great stash buster! I’ll show you how I made the black spiders dangling on grey silk threads – but feel free to experiment with other sizes and types of beads.
I used the following materials to make two matching spiders for earrings:
- (2) 12×8 mm black crystal drop for the rear body section
- (2) 6mm black glass faceted bead for the head
- around (60) size 11 Toho triangle beads for the legs (any seed bead sized beads will work)
- 10 inches of 22 gauge copper wire for the body wire and for the web thread
- 24 inches of 24 gauge copper wire for the spider legs (more for longer legs)
- 2 earring hooks
The first step is making the spider legs. In case you don’t stick around long enough to get a close look, spiders have eight legs.


Cut a 4 inch piece of 22 gauge wire and make a wrapped loop on one end. Trim and tuck in the tail from the loop. This loop will be used to attach the spider to other components.
Add the drop bead, the wrapped wires for the spider’s legs by putting the wire through the center loop and then the round head bead.
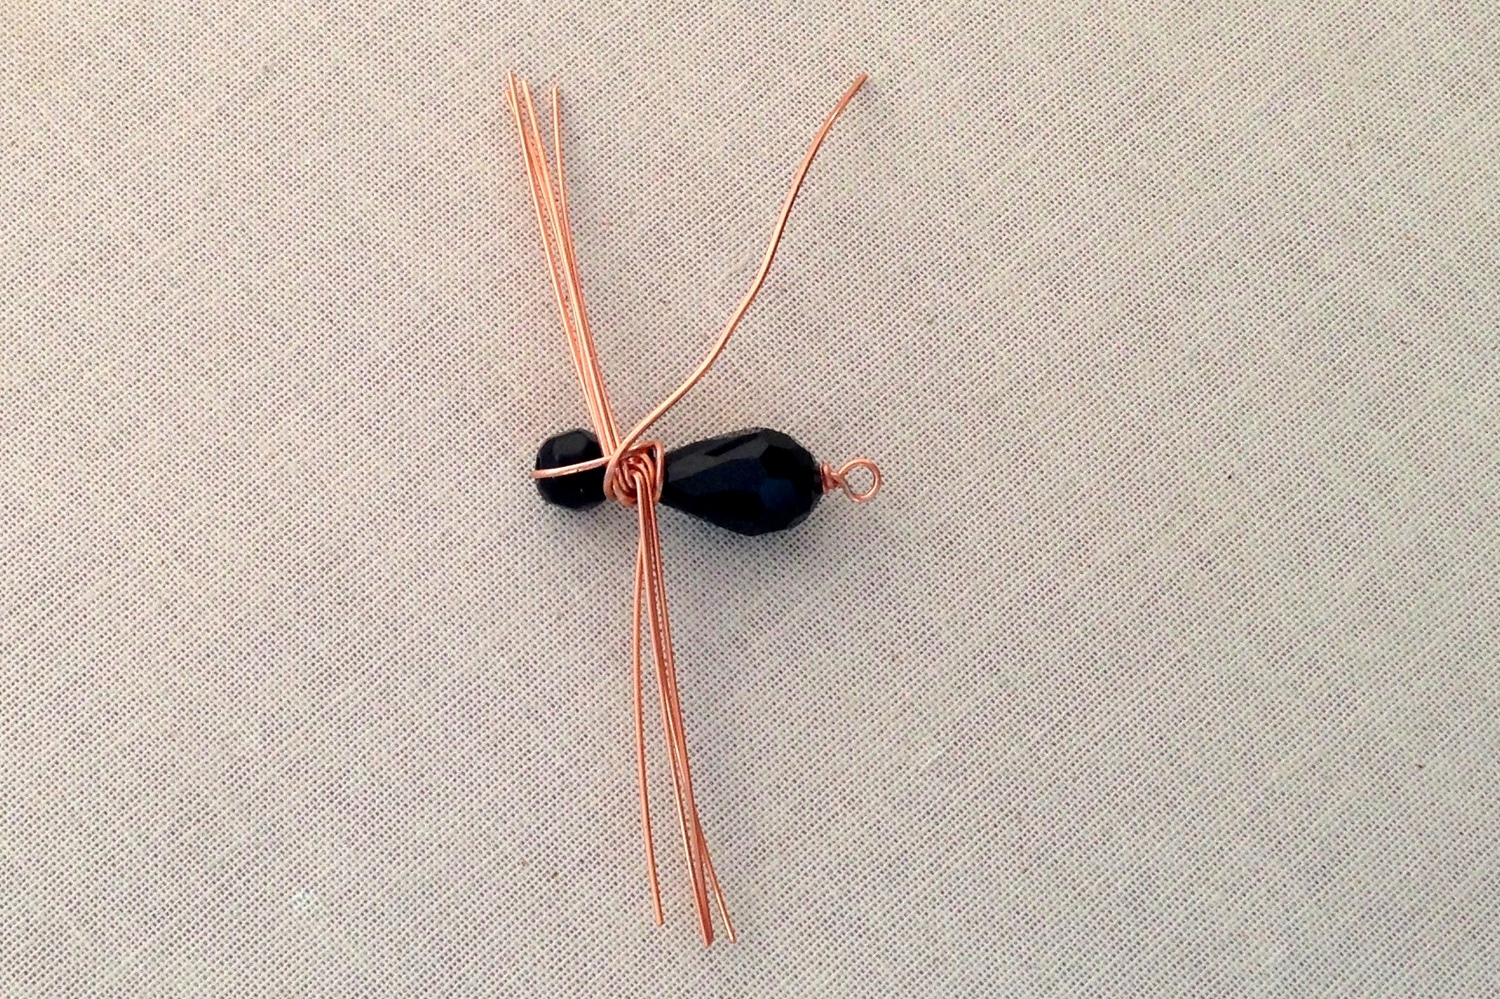
Bend the wire over the round bead and wrap it around the leg component to secure them in place. Make sure to push all the beads together and that the leg component doesn’t spin on the center wire. Trim the wire and tuck the end.

Now it’s time to add the beads to the spider legs. Spread apart the wires for the legs. Each spider leg has a section of beads, a bend in the wire and another section of beads. Point the leg wire up from the spider body, add some beads (the exact number is up to you and depends on whether you want a long leg or short leg spider). Press the beads against the spider body and then bend the wire down to secure the beads in place.

Add beads for the second section of the spider leg. Keep the beads in place by bending the wire end up next to the beads (see picture above). Trim the wire.

You can add the spiders directly to earring wires or make a piece of web silk for the spider to dangle from. Using a 3 inch piece of 22 gauge wire, make a wrapped loop, and add beads.


Repeat these steps to make a second earring.

Beaded spiders make unexpected and great pendants too! Enjoy!
Want to know when I post new free projects and tutorials? The ONLY reliable way is to sign up for my new email newsletter.
